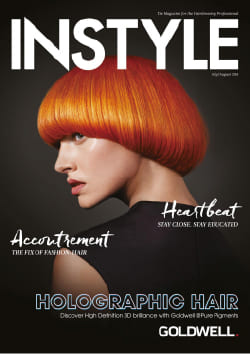
Kevin Murphy連八年任墨爾本時裝週髮型總監
INTRODUCTION
INTRODUCTION
國際外景造型大師Kevin Murphy連續八年擔任墨爾本春季時裝週的髮型總監,在為期一周的時裝週中,Kevin和他的團隊為服裝設計師們打造三種迥異的美麗造型。
Hairstyle by
Salon
Photographer
Make Up
Stylist
Remarks
<p>Kevin Murphy分享了2016年的趨勢重點,在造型上巧妙地將80年代元素帶入60、70年代的復古造型裡,剪裁上略帶凌亂的不修邊幅,搭配隨意的整理、造型。粉霧色系仍然當道,且多了一點洗褪刷色的效果。</p>
<p> </p>
<p>For the eighth year in a row Kevin Murphy has been the Creative Hair Director for Melbourne Spring Fashion Week, the premiere fashion event in Australia. The runway shows featured the fashions of local designers from all over Australia. Kevin and his international team of hairdressers created six distinct looks for the runway shows spanning the course of a week.</p>
<p> </p>
<p>Trend for 2016 is a curious mix of 60’s and 70’s with a touch of 80’s. There’s a definite bluntness to the haircuts with a decidedly more pulled together look. Pastel tones are really popular, colour will look lived in and slightly washed out.</p>
<div class="titleJL2 brHr my-5">DESIGNER SERIES OPENING SHOW</div>
<p>MSFW的開場秀髮型從陰陽對比發想,仿造日本武士之造型,做出時尚感十足的髮髻。</p>
<p> </p>
<p>Japanese inspired juxtaposition of masculine and feminine. Inspired by the Samurai an aristocratic Japanese warrior.</p>
<p> </p>
<p><img src="assets/uploads/files/2015/108/100/dsc_5569_resized.jpg?1612424503467" alt="dsc_5569_resized" /> <img src="assets/uploads/files/2015/108/100/dsc_4171_resized.jpg?1612424503467" alt="dsc_4171_resized" /></p>
<div class="titleJL2 brHr my-5">造型獨家技巧Step by step</div>
<p>◆ 噴灑永保青春於髮絲,將頭髮向後一致吹整,並區分成頂部V型、兩側與後腦四個區塊。</p>
<p>◆ 把後腦區域綁成高馬尾做基底,收攏兩側頭髮加入馬尾。</p>
<p>◆ 將龍捲風噴灑在束好的馬尾上,用造型平板夾以45度角夾直髮絲,並反折夾好的髮片,創造出緞帶般的弧度,並固定在馬尾處。</p>
<p>◆ 最後修剪髮尾,塑造方形效果,再噴灑龍捲風定型。</p>
<p> </p>
<p><img src="assets/uploads/files/2015/108/100/dsc_4136.jpg?1612424372316" alt="dsc_4136" /></p>
<div class="titleJL2 brHr my-5">EMERGING DESIGNERS Runway</div>
<p>Kevin從瑞士的攝影師Karl Keinz Weinberger的作品取材,以近似蜂窩頭的形狀並增添稍微凌亂風格,打造女孩版的英國壞男孩風。</p>
<p> </p>
<p>For this look Kevin took inspiration from the photographs of Karl Keinz Weinberger, a swiss photographer from the 50’s kinda “teddy boy”, kinda behive with a wispy bit at the back.</p>
<p> </p>
<p><img src="assets/uploads/files/2015/108/100/dsc_3628.jpg?1612424449636" alt="dsc_3628" /></p>
<div class="titleJL2 brHr my-5">造型獨家技巧Step by step</div>
<p>◆ 首先,在頭頂做U型分區與耳後分區,將頭髮紮成高馬尾,並於髮尾處反折。</p>
<p>◆ 將左側區域的頭髮以縫髮技術固定於後腦處。用尖尾梳在髮根處梳理,完成後用鬃毛書從髮尾逆刮髮絲,打造蜂窩形狀。</p>
<p>◆ 搭配龍捲風柔和蜂窩的外輪廓,加強塑形效果。</p>
<p>◆ 並以質地細緻的泡芙創造蓬鬆線條感,完成後集合髮絲到左後方,向下扭轉,縫髮固定。</p>
<p>◆ 將剩餘的頭髮反折三根手指寬度,同樣縫髮固定,並保留髮尾在外側不收尾。</p>
<div class="titleJL2 brHr my-5">DESIGNER SERIES RUNWAY 4</div>
<p>Kevin Murphy 與其團隊為第四場時裝秀打造的造型,乍看之下有如40年代的復古髮型,有著閃亮柔順的光澤,從背後細看卻能發現其髮髻的形狀帶著強烈的未來感。</p>
<p> </p>
<p>The look Kevin Murphy and his team created for the fourth Designer series runway show was a 40's look with a futuristic edge, sculpted, sleek, and very shinny.</p>
<p> </p>
<p><img src="assets/uploads/files/2015/108/100/dsc_8520_resized__1_.jpg?1612424845758" alt="dsc_8520_resized__1_" /></p>
<div class="titleJL2 brHr my-5">造型獨家技巧Step by step</div>
<p>◆ 以上引噴霧打底,吹乾頭髮以創造輕盈柔順的豐盈感,並增添頭髮光澤。</p>
<p>◆ 在後側、耳後和頂部黃金點分區,以大電棒創造捲度,再將後側頭髮固定馬尾在高枕骨區,並收攏兩側髮絲。</p>
<p>◆ 逆刮馬尾髮絲,以頭髮創造穩固的板面,柔順表層塑形。</p>
<p>◆ 同樣保持髮絲柔順,使用綁帶固定集中的髮尾,保持形狀低於髮際線,並噴灑蜂窩大師收尾。</p>
<p>◆ 在頂部內側,輕柔逆刮打造層次效果,向前操作,保持頭髮柔順。讓頭髮維持平整,在頂部黃金點達到方形效果。</p>
<p> </p>
<p><img style="font-size: 14px;" src="assets/uploads/files/2015/108/100/dsc_7328.jpg?1612424570731" alt="dsc_7328" /></p>
<p> </p>
<p>For the eighth year in a row Kevin Murphy has been the Creative Hair Director for Melbourne Spring Fashion Week, the premiere fashion event in Australia. The runway shows featured the fashions of local designers from all over Australia. Kevin and his international team of hairdressers created six distinct looks for the runway shows spanning the course of a week.</p>
<p> </p>
<p>Trend for 2016 is a curious mix of 60’s and 70’s with a touch of 80’s. There’s a definite bluntness to the haircuts with a decidedly more pulled together look. Pastel tones are really popular, colour will look lived in and slightly washed out.</p>
<div class="titleJL2 brHr my-5">DESIGNER SERIES OPENING SHOW</div>
<p>MSFW的開場秀髮型從陰陽對比發想,仿造日本武士之造型,做出時尚感十足的髮髻。</p>
<p> </p>
<p>Japanese inspired juxtaposition of masculine and feminine. Inspired by the Samurai an aristocratic Japanese warrior.</p>
<p> </p>
<p><img src="assets/uploads/files/2015/108/100/dsc_5569_resized.jpg?1612424503467" alt="dsc_5569_resized" /> <img src="assets/uploads/files/2015/108/100/dsc_4171_resized.jpg?1612424503467" alt="dsc_4171_resized" /></p>
<div class="titleJL2 brHr my-5">造型獨家技巧Step by step</div>
<p>◆ 噴灑永保青春於髮絲,將頭髮向後一致吹整,並區分成頂部V型、兩側與後腦四個區塊。</p>
<p>◆ 把後腦區域綁成高馬尾做基底,收攏兩側頭髮加入馬尾。</p>
<p>◆ 將龍捲風噴灑在束好的馬尾上,用造型平板夾以45度角夾直髮絲,並反折夾好的髮片,創造出緞帶般的弧度,並固定在馬尾處。</p>
<p>◆ 最後修剪髮尾,塑造方形效果,再噴灑龍捲風定型。</p>
<p> </p>
<p><img src="assets/uploads/files/2015/108/100/dsc_4136.jpg?1612424372316" alt="dsc_4136" /></p>
<div class="titleJL2 brHr my-5">EMERGING DESIGNERS Runway</div>
<p>Kevin從瑞士的攝影師Karl Keinz Weinberger的作品取材,以近似蜂窩頭的形狀並增添稍微凌亂風格,打造女孩版的英國壞男孩風。</p>
<p> </p>
<p>For this look Kevin took inspiration from the photographs of Karl Keinz Weinberger, a swiss photographer from the 50’s kinda “teddy boy”, kinda behive with a wispy bit at the back.</p>
<p> </p>
<p><img src="assets/uploads/files/2015/108/100/dsc_3628.jpg?1612424449636" alt="dsc_3628" /></p>
<div class="titleJL2 brHr my-5">造型獨家技巧Step by step</div>
<p>◆ 首先,在頭頂做U型分區與耳後分區,將頭髮紮成高馬尾,並於髮尾處反折。</p>
<p>◆ 將左側區域的頭髮以縫髮技術固定於後腦處。用尖尾梳在髮根處梳理,完成後用鬃毛書從髮尾逆刮髮絲,打造蜂窩形狀。</p>
<p>◆ 搭配龍捲風柔和蜂窩的外輪廓,加強塑形效果。</p>
<p>◆ 並以質地細緻的泡芙創造蓬鬆線條感,完成後集合髮絲到左後方,向下扭轉,縫髮固定。</p>
<p>◆ 將剩餘的頭髮反折三根手指寬度,同樣縫髮固定,並保留髮尾在外側不收尾。</p>
<div class="titleJL2 brHr my-5">DESIGNER SERIES RUNWAY 4</div>
<p>Kevin Murphy 與其團隊為第四場時裝秀打造的造型,乍看之下有如40年代的復古髮型,有著閃亮柔順的光澤,從背後細看卻能發現其髮髻的形狀帶著強烈的未來感。</p>
<p> </p>
<p>The look Kevin Murphy and his team created for the fourth Designer series runway show was a 40's look with a futuristic edge, sculpted, sleek, and very shinny.</p>
<p> </p>
<p><img src="assets/uploads/files/2015/108/100/dsc_8520_resized__1_.jpg?1612424845758" alt="dsc_8520_resized__1_" /></p>
<div class="titleJL2 brHr my-5">造型獨家技巧Step by step</div>
<p>◆ 以上引噴霧打底,吹乾頭髮以創造輕盈柔順的豐盈感,並增添頭髮光澤。</p>
<p>◆ 在後側、耳後和頂部黃金點分區,以大電棒創造捲度,再將後側頭髮固定馬尾在高枕骨區,並收攏兩側髮絲。</p>
<p>◆ 逆刮馬尾髮絲,以頭髮創造穩固的板面,柔順表層塑形。</p>
<p>◆ 同樣保持髮絲柔順,使用綁帶固定集中的髮尾,保持形狀低於髮際線,並噴灑蜂窩大師收尾。</p>
<p>◆ 在頂部內側,輕柔逆刮打造層次效果,向前操作,保持頭髮柔順。讓頭髮維持平整,在頂部黃金點達到方形效果。</p>
<p> </p>
<p><img style="font-size: 14px;" src="assets/uploads/files/2015/108/100/dsc_7328.jpg?1612424570731" alt="dsc_7328" /></p>
RELATED COLLECTIONS


